Angular Osteotome Diameter Guide: Choosing Between 3.3mm, 4mm, and 5mm for Sinus Lift Success
Introduction
The angular osteotome is indispensable in sinus lift procedures — condensing bone, elevating the Schneiderian membrane, and preparing implant sites atraumatically. But diameter selection is one of the most critical decisions a clinician makes. Choosing between 3.3mm, 4mm, and 5mm is a clinical decision rooted in bone anatomy, implant size, and surgical goal — not guesswork.
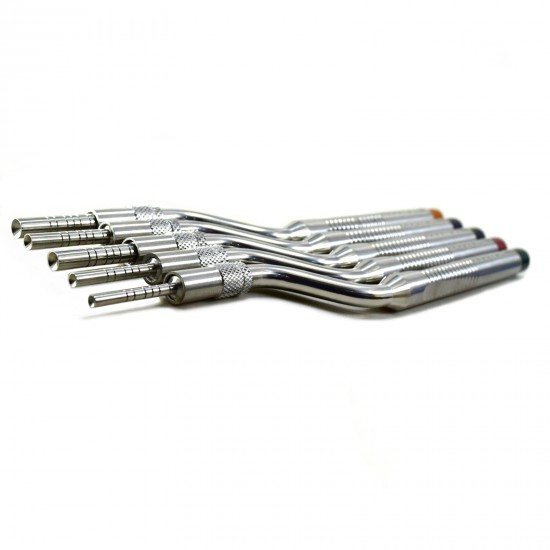
Understanding the Angular Osteotome: Structure and Function
Tapered Shank Design
The tapered shank allows progressive bone condensation as the instrument advances apically, laterally compressing cancellous bone rather than removing it — improving density at the implant site.
Beveled Tip Geometry
The beveled tip lifts the Schneiderian membrane gradually and atraumatically. A worn bevel increases perforation risk — the most feared complication of sinus elevation.
Calibrated Graduated Markings
Depth markings etched at 1–2mm intervals allow real-time penetration monitoring, preventing over-instrumentation into the sinus cavity.
Why Diameter Selection Matters in Sinus Lift Procedures
Diameter directly influences bone condensation, membrane elevation, and implant stability. Too narrow means inadequate condensation; too wide risks cortical fracture or membrane trauma. Matching diameter to the clinical situation is the foundation of a predictable outcome.
The 3.3mm Angular Osteotome: Precision for Narrow Sites
Ideal Clinical Indications
Best for narrow ridges, limited interproximal spaces, and narrow-diameter implants (3.3–3.5mm). Ideal for anterior maxilla and premolar regions with reduced ridge width.
Bone Condensation Behavior
Delivers focused lateral condensation with minimal displacement — ideal for thin cortical plates or limited cancellous volume.
Sinus Membrane Engagement
Engages a smaller membrane surface area, requiring a controlled step-by-step elevation technique. Preferred when residual bone height is less than 5mm.
Limitations
Not suitable for standard or wide-diameter implant sites — insufficient condensation compromises primary stability.
The 4mm Angular Osteotome: The Versatile Standard
Ideal Clinical Indications
The most commonly used diameter, accommodating implants from 3.75mm to 4.5mm. Ideal for most posterior maxillary sinus lift cases.
Bone Condensation Behavior
Balances focused and broad lateral compression effectively. In moderate density bone (D3), it reliably improves implant torque and osseointegration.
Sinus Membrane Engagement
Elevates the membrane efficiently — typically 3–5mm in a single transcrestal approach — while maintaining controlled perforation risk with proper sequential technique.
Limitations
May over-condense narrow sites or under-serve wide-diameter implant cases requiring additional instrumentation.
The 5mm Angular Osteotome: Power for Wide and Compromised Sites
Ideal Clinical Indications
Designed for wide-diameter implants (5mm+), wide ridges, and poor bone density (D4) cases requiring significant condensation without grafting.
Bone Condensation Behavior
Delivers the broadest lateral condensation, dramatically improving bone-to-implant contact in low-density posterior maxillary bone.
Sinus Membrane Engagement
Elevates a larger membrane surface per advancement — efficient for 5mm+ elevation — but requires measured or hydraulic technique to avoid perforation.
Limitations
Not appropriate for narrow ridges. Risk of cortical plate fracture if used without sequential dilation from smaller diameters.
Sequential Dilation: The Protocol That Unites All Three Diameters
Experienced surgeons rarely use one diameter alone. A typical sequence for a 5mm implant site: pilot drill → 3.3mm → 4mm → 5mm osteotome. Each step incrementally condenses bone and elevates the membrane — significantly reducing perforation risk compared to jumping directly to the final diameter.
Reading the Graduated Markings: Depth Control During Elevation
Before the procedure, measure residual bone height from CBCT or periapical radiographs and set a depth reference on the graduated markings. Advancement beyond the planned depth — even by 1mm — can cause membrane perforation. The markings make precision achievable beyond tactile feedback alone.
Choosing the Right Diameter: A Clinical Decision Framework
Four parameters guide diameter selection: residual bone height determines elevation technique suitability, planned implant diameter sets the final osteotome size, bone density from CBCT indicates condensation needs, and ridge width confirms safe instrumentation without fracture risk. Assess all four together and the correct diameter — or sequence — becomes clear.
Conclusion
The 3.3mm delivers precision for narrow sites, the 4mm offers versatility across most cases, and the 5mm provides condensation power for wide implants and compromised bone. Used within a sequential dilation protocol guided by calibrated depth markings, the right diameter choice is what makes sinus lift success predictable.