
Orthodontic treatment relies on precision, and that precision begins with high-quality instruments. From trimming archwires and placing molar bands to adjusting brackets and removing ligatures, orthodontists and dental professionals use a variety of sharp instruments every day. However, these tools must be handled with great care to prevent accidental injuries, maintain infection control, and ensure successful treatment outcomes.
Orthodontic tool safety is more than simply wearing gloves or sterilizing instruments after use. Instead, it involves following standardized handling techniques, using the correct instrument for each procedure, performing routine maintenance, and creating a safe clinical environment for both patients and dental teams.
Whether you manage a busy orthodontic clinic or are training as a dental professional, understanding proper safety practices helps reduce occupational hazards, extend the lifespan of valuable instruments, and improve the overall quality of patient care.
Why Orthodontic Tool Safety Is Important
Sharp orthodontic instruments are specifically designed to perform delicate procedures within the confined space of the oral cavity. Because these instruments often have pointed tips or precision cutting edges, even a minor handling mistake can lead to injuries or treatment complications.
Moreover, many orthodontic procedures involve stainless steel wires that require significant cutting force. If those wires are not controlled correctly, small fragments may become airborne and pose a risk to both the patient and the clinical team.
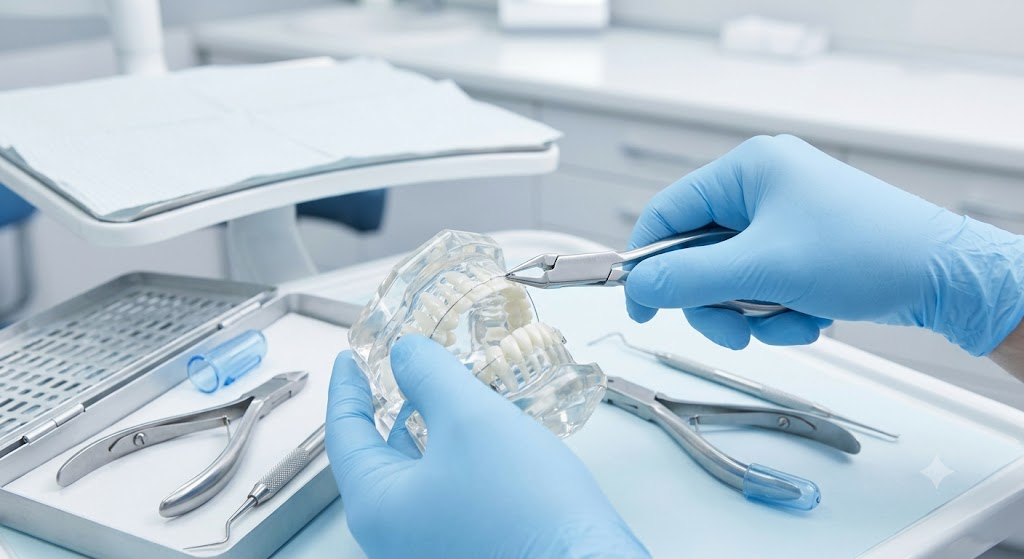
Practicing proper orthodontic tool safety helps:
- Reduce accidental sharps injuries
- Prevent cross-contamination
- Improve infection control
- Protect patients during treatment
- Extend instrument lifespan
- Maintain consistent clinical performance
- Support compliance with international sterilization guidelines
Ultimately, implementing effective safety protocols creates a safer working environment while increasing patient confidence in your practice.
Common Sharp Orthodontic Instruments
Understanding which instruments present the highest level of risk allows clinicians to handle them more safely and confidently.
Wire Cutters
Wire cutters are among the most frequently used orthodontic instruments. Since they generate considerable cutting pressure, they require careful handling during every procedure.
Common examples include:
- Distal End Cutters
- Hard Wire Cutters
- Ligature Cutters
- Pin and Ligature Cutters
Potential hazards include:
- Flying wire fragments
- Finger injuries
- Damage to soft tissues
- Accidental instrument slippage
Therefore, clinicians should always stabilize the wire before making a cut and use cutters designed to retain the trimmed wire segment whenever possible.
Orthodontic Scalers
Orthodontic scalers feature extremely sharp working ends that help remove adhesive residue, excess cement, and plaque around brackets.
Although these instruments provide excellent precision, they can easily puncture gloves or injure soft tissue if used improperly.
For safe handling:
- Maintain a firm grip.
- Use controlled hand movements.
- Avoid excessive pressure.
- Inspect the tip regularly for damage.
Dental Explorers
Dental explorers have pointed tips that allow clinicians to examine tooth surfaces and orthodontic appliances closely.
Because these instruments are exceptionally sharp, they should never be placed carelessly on trays or transferred without visual awareness.
To minimize risks:
- Keep the tip protected whenever possible.
- Pass the handle first during instrument exchange.
- Store explorers in designated instrument cassettes.
Surgical Orthodontic Instruments
Some orthodontic procedures require minor surgical instruments, including:
- Surgical scissors
- Tissue forceps
- Periosteal elevators
- Bone files
- Surgical scalpels
Furthermore, these instruments require enhanced attention because their sharp edges can cause deeper injuries than standard orthodontic tools.
Wear Appropriate Personal Protective Equipment (PPE)
Personal protective equipment provides the first layer of defense against accidental injuries and contamination.
Every clinician should wear:
- Medical-grade examination gloves
- Protective eyewear
- Surgical masks
- Face shields when necessary
- Disposable clinical gowns
- Closed-toe footwear
In addition, double gloving may provide additional protection during surgical procedures or when handling multiple sharp instruments.
Proper PPE not only protects clinicians but also reduces the likelihood of cross-contamination between patients.
Safe Handling Techniques for Sharp Orthodontic Tools
Safe handling begins before an instrument ever enters the patient’s mouth. Consequently, every member of the dental team should follow standardized procedures during instrument preparation, transfer, and use.
Pass Instruments Safely
Never pass a sharp instrument with its working end pointing toward another person.
Instead, always present the handle first while maintaining eye contact with your assistant or colleague.
During instrument transfer:
- Keep movements controlled.
- Avoid sudden hand motions.
- Ensure both individuals are ready before releasing the instrument.
- Use instrument trays whenever practical.
These simple habits significantly reduce accidental injuries during busy clinical procedures.
Maintain Clear Visibility
Sharp instruments should always remain within your line of sight.
Likewise, ensure the treatment area has adequate lighting and remains organized throughout the appointment.
Good visibility helps clinicians:
- Reduce accidental slips
- Improve precision
- Increase treatment efficiency
- Protect surrounding soft tissues
A clutter-free workspace also minimizes the chance of misplaced instruments.
Use the Correct Instrument
Every orthodontic instrument has a specific purpose. Using the wrong tool increases stress on the instrument and raises the risk of injury.
For example:
- Use distal end cutters for trimming archwires.
- Choose ligature cutters for cutting ligature wires.
- Select bracket-removing pliers during debonding procedures.
- Reserve utility pliers for their intended applications.
By comparison, using general-purpose pliers for precision cutting may damage both the instrument and the orthodontic appliance.
Maintain a Secure Grip
A slipping instrument is one of the most common causes of workplace injuries.
Therefore, clinicians should always:
- Dry gloves before handling instruments.
- Keep handles free from debris.
- Position fingers correctly.
- Apply controlled pressure rather than excessive force.
Ergonomic handles with textured surfaces further improve grip and reduce hand fatigue during lengthy procedures.
Protecting Patients During Orthodontic Procedures
Patient safety should remain the highest priority during every appointment.
For this reason, clinicians should take additional precautions whenever cutting wires or working near delicate oral tissues.
Recommended practices include:
- Place gauze behind the wire before cutting.
- Retract cheeks and lips carefully.
- Inform patients before trimming wires.
- Control wire fragments immediately after cutting.
- Use distal end cutters with safety hold mechanisms whenever available.
These techniques help prevent wire fragments from entering the oral cavity while improving patient comfort.
Infection Control and Sterilization
Sharp orthodontic instruments routinely come into contact with saliva, blood, and oral tissues. Consequently, every reusable instrument must undergo a validated cleaning and sterilization process after each patient.
A complete sterilization workflow includes:
- Pre-cleaning immediately after use
- Ultrasonic cleaning
- Thorough rinsing
- Complete drying
- Instrument inspection
- Packaging for sterilization
- Autoclave sterilization
- Proper sterile storage
Furthermore, following established infection control protocols helps reduce the risk of cross-contamination while preserving instrument performance.
Improper sterilization may lead to:
- Cross-infection
- Corrosion
- Biofilm formation
- Reduced cutting efficiency
- Shortened instrument lifespan
Inspect Instruments Before Every Procedure
Routine inspection is an essential part of orthodontic tool safety. Even premium-quality instruments can develop wear over time, especially when they are used frequently in busy orthodontic practices.
Before each appointment, examine every instrument carefully for signs of damage or reduced performance.
Look for:
- Loose box joints
- Misaligned cutting edges
- Cracks or fractures
- Rust or corrosion
- Dull cutting surfaces
- Bent instrument tips
- Excessive wear on hinges
If an instrument shows any of these issues, remove it from clinical use immediately. Continuing to use damaged instruments increases the risk of injury, compromises treatment accuracy, and may lead to costly repairs.
Store Orthodontic Instruments Properly
Proper storage plays a significant role in preventing accidental injuries and protecting expensive orthodontic instruments.
Rather than placing loose instruments in drawers, organize them using sterilization cassettes or dedicated instrument organizers. This approach keeps cutting edges protected while improving efficiency during clinical procedures.
Best storage practices include:
- Store instruments in sterilization cassettes.
- Protect sharp tips with silicone holders where appropriate.
- Separate clean and contaminated instruments.
- Keep cutting edges from touching one another.
- Maintain a dry storage environment.
- Label instrument trays for quick identification.
Additionally, organized storage helps reduce preparation time and minimizes the chance of damaging precision instruments.
Clean Sharp Orthodontic Tools Correctly
Cleaning begins immediately after patient treatment. Allowing debris to dry on an instrument makes cleaning more difficult and may reduce sterilization effectiveness.
A recommended cleaning process includes:
Step 1: Remove Visible Debris
Wipe away blood, saliva, and other contaminants as soon as possible after the procedure.
Step 2: Soak in an Enzymatic Solution
Use an approved enzymatic cleaner to loosen biological material before mechanical cleaning.
Step 3: Use an Ultrasonic Cleaner
Ultrasonic cleaning reaches small crevices that manual cleaning may miss.
Step 4: Rinse Thoroughly
Remove all cleaning solution residue using clean water.
Step 5: Dry Completely
Moisture left on stainless steel instruments may contribute to corrosion over time.
Step 6: Lubricate Hinged Instruments
Apply instrument lubricant to box joints and hinges according to the manufacturer’s recommendations.
Step 7: Sterilize Using an Autoclave
Complete the process with validated autoclave sterilization before returning instruments to clinical use.
Most importantly, avoid abrasive brushes or harsh chemicals that can damage cutting edges and reduce instrument longevity.
Prevent Occupational Injuries in the Orthodontic Clinic
Workplace injuries often result from rushed procedures, poor organization, or inadequate training. Therefore, every orthodontic practice should establish standardized safety protocols that all team members follow consistently.
Effective injury prevention strategies include:
- Conduct regular staff safety training.
- Review sharps handling procedures.
- Dispose of damaged instruments safely.
- Report workplace injuries immediately.
- Maintain clean and organized treatment areas.
- Replace worn instruments promptly.
As a result, practices can reduce accidents while improving workflow efficiency and patient confidence.
Maintain Instruments for Long-Term Safety
Routine maintenance keeps orthodontic instruments functioning safely and efficiently. Even the highest-quality stainless steel instruments require periodic care to maintain their cutting performance and alignment.
A comprehensive maintenance program should include:
- Lubricating hinges regularly
- Inspecting alignment
- Testing cutting performance
- Replacing worn cutters
- Sharpening instruments when appropriate
- Following manufacturer maintenance recommendations
Likewise, maintaining instruments regularly reduces repair costs and extends their service life.
Common Safety Mistakes to Avoid
Even experienced clinicians can develop habits that increase safety risks. Recognizing these common mistakes helps prevent avoidable injuries.
Avoid the following:
- Using dull wire cutters
- Applying excessive force
- Carrying exposed sharp instruments by hand
- Skipping sterilization steps
- Mixing sterile and contaminated instruments
- Ignoring loose hinges
- Dropping instruments onto hard surfaces
- Using damaged pliers during treatment
Instead, replace worn instruments as soon as signs of damage appear and encourage all staff members to report equipment concerns immediately.
Choose High-Quality Orthodontic Instruments
The quality of an instrument directly affects both clinical performance and safety. Well-manufactured orthodontic tools provide greater precision, improved durability, and more predictable handling.
When selecting orthodontic instruments, consider the following features:
- Surgical-grade stainless steel
- Corrosion-resistant construction
- Precision-engineered cutting edges
- Ergonomic handles
- Smooth hinge movement
- Excellent balance and control
- Compliance with international quality standards
Although premium instruments may require a higher initial investment, they often deliver better long-term value through increased durability and consistent performance.
Build a Strong Safety Culture
A safe orthodontic practice depends on more than high-quality instruments. It also requires a team that understands and follows established safety procedures every day.
To strengthen your clinic’s safety culture:
- Provide ongoing staff training.
- Review infection control protocols regularly.
- Perform routine safety audits.
- Maintain written sterilization procedures.
- Encourage open communication about safety concerns.
- Replace worn instruments before they become hazardous.
Ultimately, a proactive approach reduces workplace injuries, improves treatment efficiency, and enhances patient.
Conclusion
Maintaining excellent orthodontic tool safety is essential for protecting patients, clinicians, and support staff. From selecting high-quality instruments to following proper handling, cleaning, sterilization, storage, and maintenance procedures, every step contributes to a safer and more efficient orthodontic practice.
Furthermore, creating a culture of safety through regular staff training and routine equipment inspections reduces workplace injuries while supporting consistent treatment outcomes. By investing in reliable orthodontic instruments and implementing standardized safety protocols, dental professionals can improve clinical efficiency, extend instrument lifespan, and provide the highest standard of patient care.
Frequently Asked Questions:
Orthodontic tool safety refers to the proper handling, cleaning, sterilization, maintenance, and storage of orthodontic instruments to protect both patients and dental professionals from injuries and cross-contamination.
Wire cutters, ligature cutters, distal end cutters, scalers, explorers, surgical scissors, and scalpels are among the sharpest orthodontic instruments and require careful handling.
Routine inspections help identify dull edges, loose hinges, corrosion, or other defects that could compromise safety, reduce treatment accuracy, or damage orthodontic appliances.
Store instruments in sterilization cassettes or protective organizers with their cutting edges shielded. Proper storage reduces accidental injuries and helps preserve instrument quality.
Reusable orthodontic instruments should be cleaned and sterilized after every patient according to established infection control guidelines and the manufacturer’s instructions.
Yes. Regular maintenance helps preserve cutting efficiency, prevents unexpected instrument failure, reduces repair costs, and extends the lifespan of orthodontic tools.