Accurate dental impressions depend on more than just high-quality materials—they rely heavily on proper adhesion between the impression material and the tray. Even the most advanced elastomeric materials can fail if they detach from the tray during removal. That’s where impression tray adhesives and tray design come into play. Understanding how tray structure influences bonding can significantly improve clinical outcomes and reduce costly remakes (Impression tray adhesive application).
Why Impression Tray Adhesive Matters
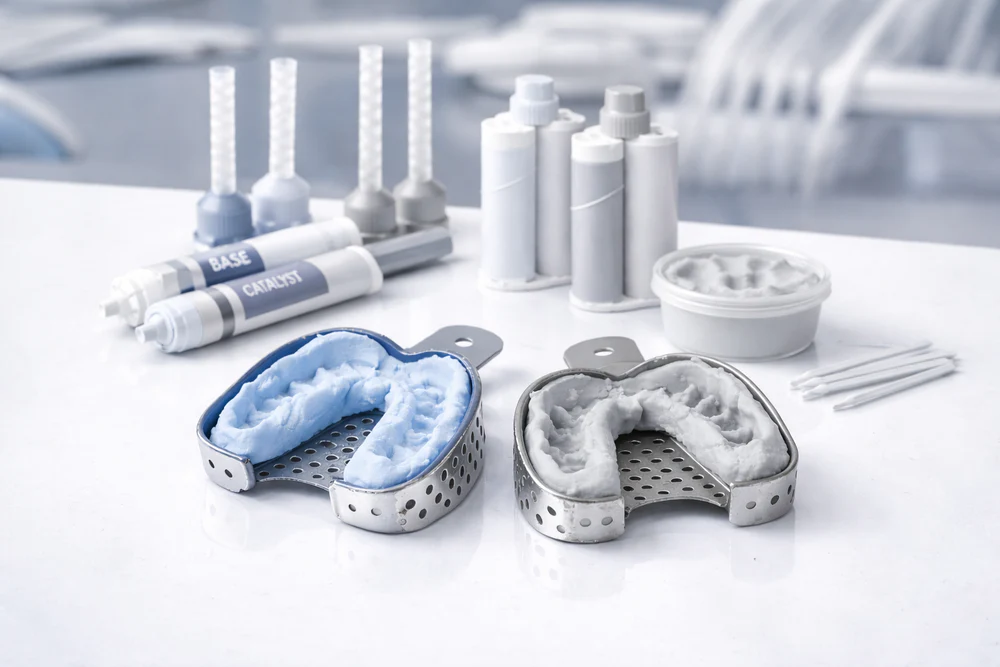
Impression tray adhesives are specialized bonding agents designed to secure impression materials—such as alginate, polyvinyl siloxane (PVS), or polyether—to the tray surface. Their primary role is to prevent distortion caused by material separation during removal from the mouth.
Without proper adhesion:
- The impression may shrink or warp
- Marginal accuracy can be compromised
- Retakes increase chair time and material cost
However, adhesive effectiveness is not just about application—it’s closely tied to tray design.
Understanding Tray Design and Its Role in Bonding
The design of the impression tray directly affects how well the adhesive and material interact. Each structural feature either enhances or limits bonding efficiency.
1. Perforated vs. Non-Perforated Trays
- Perforated Trays
These trays feature multiple holes that allow impression material to flow through and mechanically lock into place. This creates a dual-retention system: mechanical interlocking plus adhesive bonding.
Result: Stronger retention and reduced risk of separation. - Non-Perforated (Solid) Trays
These rely entirely on chemical adhesion provided by the tray adhesive.
Result: Requires meticulous adhesive application to avoid failure.
Perforated trays offer an added safety layer, especially when working with less retentive materials.
2. Tray Material Composition
Different tray materials interact differently with adhesives:
- Plastic Trays
Often disposable and require adhesives specifically formulated for plastic surfaces. - Metal Trays (Stainless Steel or Aluminum)
More rigid and reusable, but need compatible adhesives to ensure proper bonding. Using the wrong adhesive for the tray material can lead to bonding failure, even if application is correct.
3. Surface Texture and Cleanliness
- Smooth tray surfaces reduce mechanical grip
- Roughened or sandblasted surfaces enhance adhesion
- Contaminants like saliva, oils, or residue weaken bonding
Always clean and dry the tray before applying adhesive.
4. Tray Rigidity and Stability
Flexible trays can distort during impression removal, breaking the bond between tray and material. Rigid trays maintain shape and support adhesive integrity (Impression tray adhesive application).
A stable tray preserves both impression accuracy and adhesive performance.
Best Practices for Adhesive Application
To maximize bonding efficiency, follow these steps:
- Select the Right Adhesive
Match the adhesive with both the tray material and impression material type. - Apply Evenly
Use a brush to coat all internal surfaces, including borders. - Allow Proper Drying Time
Most adhesives require 5–15 minutes to become tacky and effective. - Avoid Overapplication
Excess adhesive can pool and interfere with impression accuracy. - Store Properly
Keep adhesive containers sealed to prevent solvent evaporation.
Common Mistakes to Avoid
- Skipping adhesive with non-perforated trays
- Applying adhesive immediately before loading material (no drying time)
- Using expired or thickened adhesive
- Ignoring tray compatibility guidelines
Clinical Impact of Proper Bonding
When tray design and adhesive application are optimized:
- Impression accuracy improves
- Marginal fit of restorations is enhanced
- Remakes and adjustments are minimized
- Workflow becomes more efficient
Conclusion
Impression success is not just about the material—it’s a combination of adhesive science and tray engineering. The design of the tray plays a crucial role in how well the impression material bonds and performs under clinical conditions. By understanding these relationships and following proper adhesive protocols, dental professionals can ensure consistent, high-quality impressions every time.