
Orthodontic treatment relies on precision. Every bend, loop, and adjustment made to an archwire directly influences tooth movement and treatment outcomes. Among the many used in modern dentist are considered indispensable for creating consistent loops that deliver controlled orthodontic forces.
Whether you’re an orthodontist, dental student, orthodontic resident, or dental laboratory technician, mastering is an essential skill. This comprehensive guide explains everything you need to know from instrument anatomy and clinical applications to a detailed step-by-step tutorial, maintenance tips, and common mistakes to avoid.
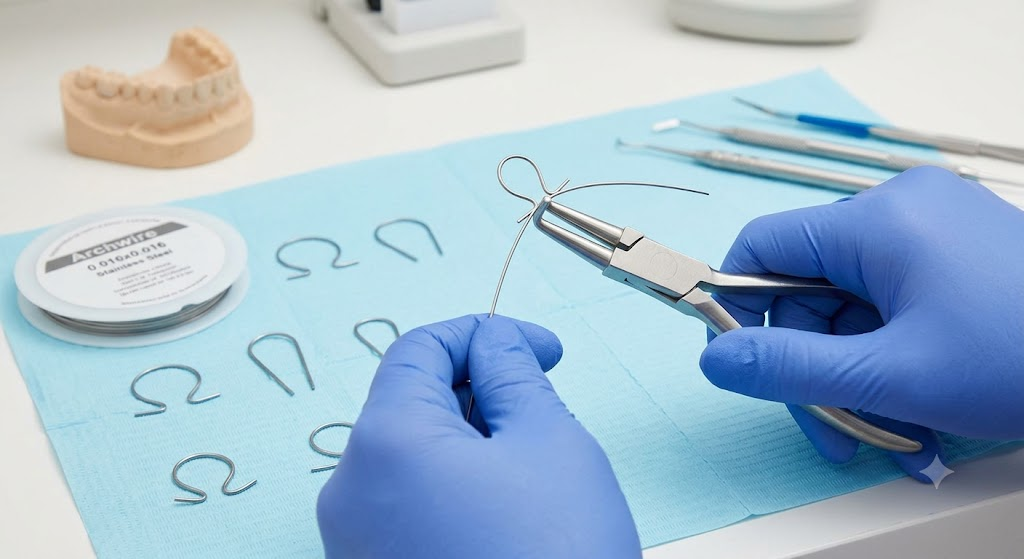
What Are Loop Forming Pliers?
They are specialized orthodontic pliers designed to create smooth, uniform loops in orthodontic archwires. These loops serve various purposes, including:
- Closing extraction spaces
- Applying light continuous forces
- Increasing wire flexibility
- Activating tooth movement
- Fabricating custom orthodontic appliances
Unlike standard bending pliers, loop forming pliers feature rounded beaks that create symmetrical loops without damaging the wire.
Why Loop Forming Pliers Are Essential in Orthodontics
Creating loops manually with conventional pliers often leads to inconsistencies. Loop forming pliers provide:
- Repeatable loop dimensions
- Greater precision
- Reduced wire distortion
- Faster chairside procedures
- Better treatment efficiency
- Improved patient comfort
Their ergonomic design also minimizes operator fatigue during repeated wire adjustments.
Common Applications of Loop Forming Pliers
They are widely used in:
- Closing loops
- Vertical loops
- Omega loops
- T-loops
- Retraction loops
- Utility arches
- Custom orthodontic appliances
- Space closure mechanics
- Finishing archwire adjustments
- Orthodontic laboratory procedures
They are suitable for stainless steel, nickel titanium (NiTi), beta titanium (TMA), and other orthodontic wires, depending on wire dimensions and manufacturer recommendations.
Anatomy of Loop Forming Pliers
Understanding the instrument helps improve accuracy.
Rounded Beaks
Designed to produce perfectly circular loops with minimal wire damage.
Precision Tips
Ensure consistent loop size and symmetry.
Box Joint
Provides stability during bending while maintaining smooth movement.
Ergonomic Handles
Offer improved grip, better control, and reduced hand fatigue.
Stainless Steel Construction
High-quality surgical stainless steel provides corrosion resistance, durability, and long service life.
Types of Loops Created Using Loop Forming Pliers
Omega Loops
Commonly used for:
- Archwire activation
- Anchorage control
- Finishing adjustments
Vertical Loops
Useful for:
- Space closure
- Increasing wire flexibility
- Controlled tooth movement
Closing Loops
Ideal for:
- Extraction cases
- Retraction mechanics
- Controlled force application
T-Loops
Frequently used in segmented mechanics where precise force systems are required.
Step-by-Step Tutorial: How to Use Loop Forming Pliers
Step 1: Select the Appropriate Wire
Choose the correct orthodontic wire according to the treatment stage.
Common choices include:
- Stainless steel
- TMA wire
- Nickel Titanium (when applicable)
Ensure the wire diameter matches the pliers’ specifications.
Step 2: Mark the Loop Position
Using a marker or measuring gauge, identify the exact location where the loop should be formed.
Accurate measurements improve treatment precision and reduce chairside adjustments.
Step 3: Position the Wire
Insert the wire between the rounded beaks of the loop forming pliers.
Ensure:
- The marked position aligns with the center of the beaks.
- The wire sits securely.
- No twisting occurs.
Step 4: Apply Gentle Pressure
Close the handles smoothly.
Avoid sudden force.
The rounded beaks will gradually bend the wire into a uniform loop.
Step 5: Rotate if Necessary
For larger loops or specialized configurations:
- Rotate the pliers slightly.
- Continue bending gradually.
- Maintain symmetry throughout the process.
Step 6: Inspect the Loop
Check:
- Diameter consistency
- Symmetry
- Wire integrity
- Smooth curvature
- Proper orientation
If needed, make minor adjustments.
Step 7: Place the Archwire
Insert the completed wire into the brackets.
Evaluate:
- Loop activation
- Patient comfort
- Wire seating
- Tooth movement objectives
Clinical Tips for Better Loop Formation
Experienced orthodontists often recommend:
- Practice on spare wire before patient use.
- Use slow, controlled movements.
- Avoid excessive force.
- Always verify measurements.
- Maintain loop symmetry.
- Use quality orthodontic pliers for consistent results.
Common Mistakes to Avoid
Applying Too Much Pressure
Excessive force can:
- Flatten loops
- Damage wire surfaces
- Create stress points
Incorrect Wire Positioning
Poor positioning leads to:
- Uneven loops
- Inconsistent activation
- Additional chairside corrections
Using Damaged Pliers
Worn beaks reduce precision.
Inspect instruments regularly.
Ignoring Wire Type
Different wires have unique mechanical properties.
Always follow the manufacturer’s recommendations.
Benefits of Using High-Quality Loop Forming Pliers
Premium orthodontic pliers offer:
Greater Precision
Uniform loops improve biomechanical efficiency.
Faster Procedures
Reduced adjustment time shortens appointments.
Better Treatment Outcomes
Accurate wire bending supports predictable tooth movement.
Enhanced Durability
Medical-grade stainless steel ensures years of reliable performance.
Improved Ergonomics
Comfortable handles reduce repetitive strain during long procedures.
How to Maintain Loop Forming Pliers
Proper maintenance preserves instrument accuracy.
Cleaning
- Rinse immediately after use.
- Remove debris thoroughly.
Ultrasonic Cleaning
Use an approved ultrasonic cleaner to eliminate residue.
Sterilization
Autoclave according to manufacturer guidelines.
Lubrication
Apply instrument lubricant to the box joint periodically.
Inspection
Check for:
- Loose joints
- Misaligned beaks
- Surface wear
- Corrosion
Replace damaged instruments promptly.
Choosing the Best Loop Forming Pliers
When purchasing orthodontic pliers, consider:
- Surgical-grade stainless steel
- Precision-machined beaks
- Smooth box joint
- Ergonomic grip
- Corrosion resistance
- Autoclavable construction
- Trusted manufacturer
- CE or relevant regulatory compliance
Conclusion
They are among the most valuable orthodontic pliers in clinical practice. Their ability to create precise, consistent loops enables orthodontists to deliver controlled forces, improve treatment efficiency, and achieve predictable tooth movement.
By following the step-by-step techniques outlined in this guide, selecting high-quality instruments, and maintaining them properly, clinicians can enhance both workflow and patient outcomes. Whether you’re fabricating omega loops, vertical loops, or customized archwire configurations, investing time in mastering loop forming pliers will improve the quality and precision of your orthodontic treatments.
Frequently Asked Questions
Loop forming pliers are used to create precise loops in orthodontic archwires for space closure, tooth movement, and customized orthodontic mechanics.
They can be used with many wire types, including stainless steel and TMA. Compatibility depends on the wire size and the pliers’ design. Always follow the manufacturer’s specifications.
Symmetrical loops produce more predictable force systems, improving treatment accuracy and reducing unwanted tooth movement.
Replacement depends on usage and maintenance. If the beaks become worn, misaligned, or damaged, replacement is recommended to maintain precision.
Yes. They are commonly used during orthodontic training and are essential instruments for learning wire-bending techniques.