
Sterilization pouch labeling and sealing form the last two safeguards before an instrument reaches your patient. A correct label identifies the sterilizer, cycle, date, and load for traceability. A proper seal keeps microorganisms out until the moment of use. Skip either step, and you can no longer guarantee sterility even if the autoclave cycle ran perfectly.
For dental and medical practices, this isn’t a minor detail. It’s the last checkpoint before use. It’s also one of the most common places where infection control quietly breaks down. A poorly sealed or mislabeled pouch can still look fine on the surface.
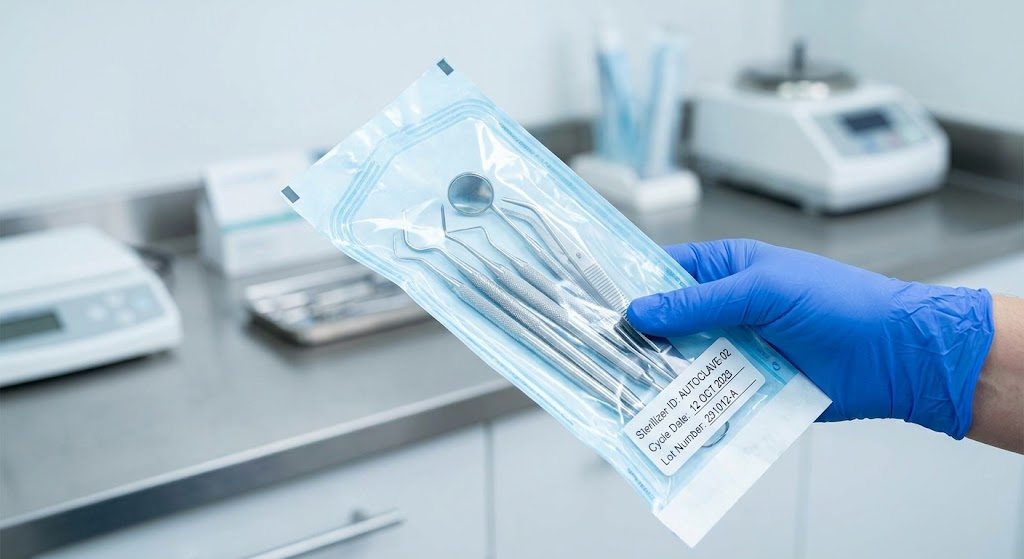
Why Sterilization Pouch Labeling and Sealing Matter So Much
Busy practices often treat packaging as a formality. Something to rush through between patients. In reality, packaging is where sterility assurance either holds up or fails.
CDC Best Practices for Sterilization in Dental Settings. CDC guidance sets a clear standard here. Labels should show the sterilizer used, the cycle or load number, and the sterilization date. Add an expiration date too, if your protocol requires one. This information lets staff trace and recall items fast if a cycle fails. Skip it, and a single failed load becomes impossible to track down with confidence.
Sealing carries equal weight. An incomplete seal lets air, moisture, and airborne contaminants back into the pouch the moment it leaves the sterilizer. That undoes the entire cycle instantly. This is exactly why AAMI treats seal integrity as a core requirement, not a finishing touch.
Understanding the Two Sealing Methods
Before you dive into technique, know your options first. Most practices choose between two sealing methods. Each comes with its own trade-offs.
| Feature | Self-Seal Pouches | Heat-Seal Pouches |
|---|---|---|
| Sealing method | Adhesive strip, fold-and-press | Heat sealer machine |
| Speed | Faster, no equipment needed | Slower, needs warm-up time |
| Seal reliability | Good, but creasing can weaken it | Excellent flat, pressed seam |
| Equipment cost | Low (no machine needed) | Higher (requires a heat sealer) |
| Best for | Smaller practices, lower volume | High-volume sterilization |
| Risk factor | Weak adhesive contact if not pressed firmly | Seal failure if settings drift off-spec |
Neither method wins outright. Your practice’s volume, budget, and existing equipment should drive the choice. That said, heat-sealed pouches tend to deliver more consistent results in high-turnover settings, since the sealing parameters stay fixed and repeatable. CDC Sterilization and Disinfection Summary
Step-by-Step: Proper Sterilization Pouch Labeling
Follow this sequence for every pouch, every time.
- Clean and dry the instrument first. Never package a wet or visibly soiled instrument. Trapped moisture can compromise the cycle and encourage microbial growth.
- Select the correct pouch size. Leave space between the instrument and the seal line. This allows sterilant penetration and steam circulation.
- Insert an internal chemical indicator. This confirms that sterilizing conditions reached the inside of the pouch, not just the exterior.
- Orient the instrument correctly. Keep hinged instruments open. Face paper-to-plastic consistently so sterilant penetrates evenly.
- Label before you seal, not after. Write directly on the designated label area with a non-toxic, indicator-compatible marker. Avoid writing on the film itself ink can flake or smear during the cycle.
- Include the minimum required label information:
- Sterilizer identification (if you run multiple units)
- Cycle or load number
- Date of sterilization
- Expiration date, if your practice uses date-related shelf life
- Operator initials, for accountability
- Seal the pouch fully. Use either the self-seal strip or heat sealer, and run the seam edge to edge without gaps.
- Inspect the seal visually before you load the pouch into the sterilizer.
Quick Tips for sterilization pouch labeling & sealing
- Leave at least one inch between the sealed edge and the instrument. This reduces stress on the seam during steam cycling.
- Never overload a pouch. Overcrowding raises puncture risk and blocks steam penetration.
- Match your heat sealer’s temperature and dwell time to the pouch manufacturer’s specs. Wrong settings cause most seal failures.
- Store sealed pouches in a clean, dry, closed cabinet. Avoid areas under sinks or exposed to moisture.
- Rotate stock using first-in, first-out if your practice follows date-related shelf life.
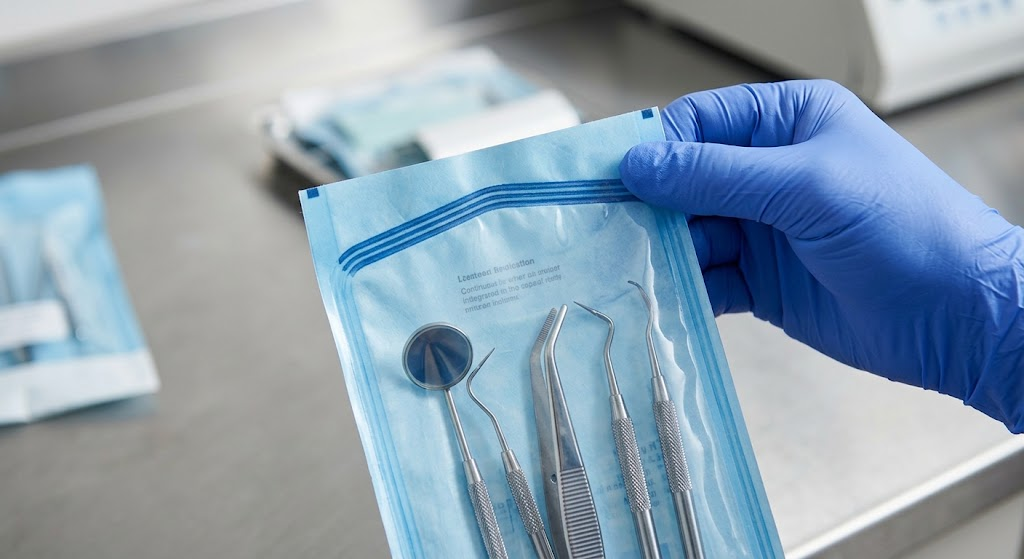
Common Labeling and Sealing Mistakes (And How to Avoid Them)
| Mistake | Why It’s a Problem | Fix |
|---|---|---|
| Writing on the pouch after sealing | Ink or pressure can weaken the seal | Label before you seal, always |
| Overpacking the pouch | Blocks sterilant, raises puncture risk | Match pouch size to instrument set |
| Skipping the internal indicator | No proof sterilization reached the instrument | Use internal and external indicators together |
| Incomplete heat seal (gaps or bubbles) | Lets contamination back in | Check sealer calibration; inspect every seam |
| Missing date or lot number | Blocks traceability during a recall | Standardize a labeling checklist for staff |
| Storing pouches in damp areas | Moisture breaks event-related sterility | Use enclosed, dry cabinets only |
Event-Related vs. Date-Related Sterility: Which Should You Use?
Many dental teams get confused here. How long does a sealed pouch actually stay valid? Two accepted models answer this question.
Date-related shelf life gives each package an expiration date. Staff use items on a first-in, first-out basis.
Event-related shelf life works differently. A properly sterilized, sealed package stays sterile indefinitely — unless something compromises it. A torn, wet, or punctured pouch counts as an event. Under this model, staff inspect the packaging before every use instead of checking a printed date.
Both models still depend on careful sealing. Event-related sterility actually raises the stakes on seal quality, since the seal not a calendar date determines whether contents stay safe.
Pros and Cons at a Glance
Date-Related Shelf Life
- ✅ Simple to audit and rotate stock
- ✅ A clear expiration date removes guesswork
- ❌ Can lead to reprocessing items that are still sterile
- ❌ Demands consistent date tracking from every staff member
Event-Related Shelf Life
- ✅ Cuts unnecessary reprocessing and waste
- ✅ Keeps focus on the packaging’s actual condition
- ❌ Requires thorough staff training on inspection habits
- ❌ Leaves no expiration backstop, so sealing standards must stay high
Sterilization Pouch Labeling & Sealing Checklist
Run through this list during daily reprocessing:
- Clean, dry, and inspect the instrument before packaging
- Choose the correct pouch size
- Place an internal chemical indicator inside the pouch
- Orient the instrument correctly (hinges open, paper-to-plastic)
- Complete the label before sealing (sterilizer ID, date, cycle/lot, initials)
- Seal the pouch fully, edge to edge, with no gaps or creases
- Inspect the seal visually before loading the sterilizer
- Store sterilized pouches in a clean, dry, enclosed space
Final Thoughts
Sterilization pouch labeling and sealing might look like the smallest steps in the reprocessing chain. In practice, they often decide whether every earlier step cleaning, packaging, running the cycle actually protects your patient. Consistent labeling supports traceability. A proper, gap-free seal keeps instruments genuinely sterile until you open them. Build these habits into a standardized checklist instead of relying on memory. That’s the simplest way to keep your practice compliant and your patients safe.
Ready to upgrade your sterilization supplies?
FAQ
What information must be included on a sterilization pouch label?
At minimum, include the sterilizer used, the cycle or load number, and the sterilization date. Add an expiration date if your practice follows date-related shelf life. This lets staff trace and recall instruments fast after a failed cycle.
Should I label the pouch before or after sealing it?
Always label before you seal. Writing on a sealed pouch risks disturbing the seam. Ink applied afterward can also smear or interfere with the indicator.
What’s the difference between an internal and external chemical indicator?
An external indicator sits on the outside of the pouch and shows that the package went through a sterilization process. An internal indicator sits inside with the instrument. It confirms that sterilizing conditions actually reached that spot making it the more reliable check.
How long does a sterilized pouch stay sterile?
It depends on your protocol. Under event-related sterility, a package stays sterile indefinitely as long as the packaging stays intact, dry, and undamaged. Under date-related protocols, staff assign an expiration date and rotate stock first-in, first-out.
Can I reuse a sterilization pouch?
No. Manufacturers design these pouches for single use only. Once you open a pouch, you can’t reseal it for another cycle, since the seal and indicator can’t guarantee reliable performance a second time.
What causes sterilization pouch seal failure?
Wrong heat sealer temperature or timing causes most failures. Overpacking, folding errors on self-seal pouches, and worn sealing equipment also contribute. Regular calibration checks and visual seal inspection catch these problems early.
Is self-seal or heat-seal better for a dental practice?
Both can achieve reliable sterility when you use them correctly. Self-seal pouches offer convenience and lower upfront cost. Heat-seal pouches usually deliver a more consistent, gap-free seam, which makes them popular in higher-volume practices.