
Every orthodontic clinic has unique treatment goals, patient demographics, and workflow requirements. While pre-packaged orthodontic instrument kits provide convenience, they may include tools you rarely use while missing instruments essential to your daily procedures. Building a custom orthodontic kit for clinics allows dental professionals to create an instrument collection tailored to their practice, improving efficiency, reducing costs, and ensuring every procedure is performed with the right tools.
Whether you’re opening a new orthodontic practice, expanding your services, or replacing outdated equipment, a carefully selected orthodontic instrument set can significantly improve clinical productivity and patient outcomes.
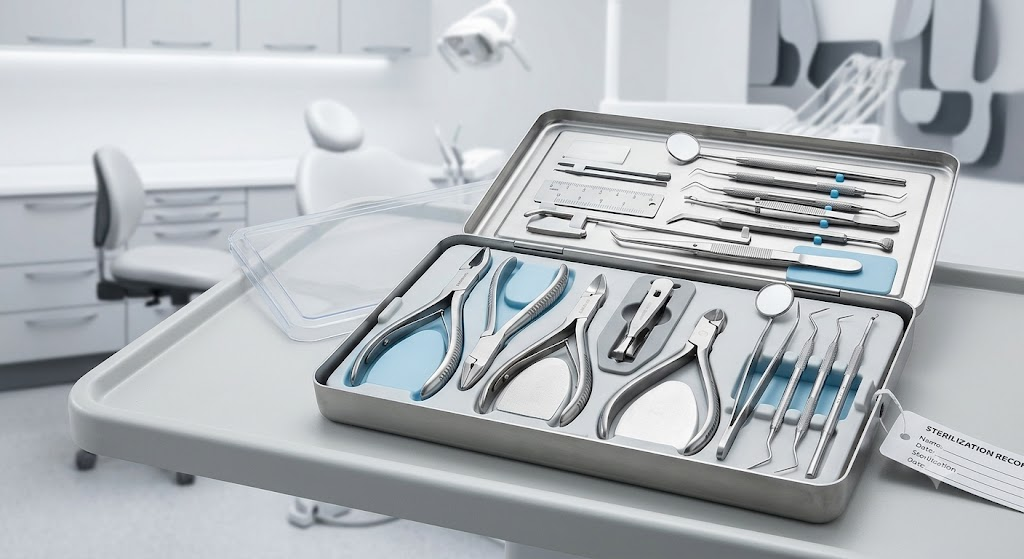
This comprehensive guide explains everything you need to know about building a custom orthodontic instrument kit that supports modern orthodontic treatment while meeting sterilization standards and long-term investment goals.
Why Choose a Custom Orthodontic Instrument Kit?
A customized kit provides flexibility that standard instrument sets cannot offer.
Benefits include:
- Eliminates unnecessary instruments
- Matches your treatment techniques
- Supports specific orthodontic procedures
- Reduces equipment costs
- Improves chairside efficiency
- Simplifies inventory management
- Enhances clinician comfort
- Allows gradual expansion as your practice grows
Rather than paying for instruments you seldom use, your clinic invests only in the orthodontic tools required for everyday procedures.
Understanding Your Clinic’s Needs Before Building a Kit
Before purchasing instruments, evaluate your practice.
Consider:
Types of Treatments
Do you primarily provide:
- Fixed braces
- Ceramic brackets
- Self-ligating systems
- Clear aligners
- Lingual orthodontics
- Retainers
- Interceptive orthodontics
- Minor orthodontic corrections
Each treatment requires different instruments.
Number of Patients
Higher patient volumes require:
- Multiple instrument sets
- Faster sterilization rotation
- Backup instruments
- Larger sterilization cassettes
Busy clinics often maintain several complete orthodontic kits to avoid interruptions during sterilization cycles.
Number of Clinicians
Multiple orthodontists or assistants may each prefer slightly different instruments based on:
- Hand size
- Grip preference
- Instrument weight
- Procedure style
Custom kits allow personalized configurations.
Essential Instruments Every Orthodontic Kit Should Include
A complete orthodontic kit for clinics should cover every stage of treatment.
1. Weingart Pliers
Used for:
- Archwire placement
- Wire adjustment
- Ligature manipulation
- Wire insertion
These versatile pliers are considered one of the most frequently used orthodontic instruments.
2. Bird Beak Pliers
Ideal for:
- Loop formation
- Wire bending
- Appliance fabrication
- Precision adjustments
3. Distal End Cutters
Essential for:
- Cutting excess archwire
- Holding wire ends after cutting
- Preventing wire fragments from entering the oral cavity
4. Ligature Cutters
Designed specifically for:
- Cutting ligature wires
- Removing stainless steel ligatures
- Improving procedural efficiency
5. Mathieu Needle Holders
Useful during:
- Elastic ligature placement
- Elastic chain application
- Separator placement
6. Bracket Positioning Tweezers
These instruments assist with:
- Accurate bracket handling
- Precise bracket placement
- Reduced contamination
7. Bracket Removing Pliers
Necessary for:
- Safe bracket debonding
- Minimizing enamel damage
- Comfortable removal procedures
8. Band Removing Pliers
Designed to:
- Remove orthodontic bands safely
- Reduce patient discomfort
- Protect surrounding tissues
9. Bite Stick
Used for:
- Proper band seating
- Even pressure distribution
- Improved band adaptation
10. Scalers and Adhesive Removal Instruments
Essential after debonding for:
- Cement removal
- Adhesive cleanup
- Surface finishing
Additional Instruments for Advanced Orthodontic Clinics
As your practice expands, consider adding:
- Torque pliers
- Utility pliers
- Three-prong pliers
- Cinch back pliers
- Hollow chop pliers
- Elastic placing pliers
- Arch forming pliers
- Distal cinching instruments
- Wire bending pliers
- Bracket height gauges
These instruments improve precision during advanced orthodontic procedures.
Diagnostic Instruments to Include
Your orthodontic setup should also contain diagnostic tools.
Recommended instruments include:
- Mouth mirrors
- College tweezers
- Explorers
- Periodontal probes
- Cheek retractors
- Intraoral photography mirrors
- Measuring gauges
Diagnosis is the foundation of successful orthodontic treatment.
Instrument Organization Matters
Even the best orthodontic instruments become inefficient if poorly organized.
Consider using:
- Sterilization cassettes
- Procedure-specific trays
- Color-coded silicone holders
- Instrument organizers
- Labeled storage systems
Well-organized kits reduce chairside delays and improve workflow.
Choose High-Quality Stainless Steel Instruments
Premium materials directly affect durability.
Look for instruments manufactured from:
- Medical-grade stainless steel
- Surgical stainless steel
- Corrosion-resistant alloys
Quality instruments offer:
- Longer service life
- Better cutting performance
- Improved resistance to corrosion
- Easier sterilization
- Consistent clinical accuracy
Ergonomic Design Improves Productivity
Orthodontists often perform repetitive hand movements throughout the day.
Choose instruments featuring:
- Lightweight construction
- Textured grips
- Balanced weight
- Comfortable handles
- Precision hinges
Ergonomic designs reduce hand fatigue and increase control.
Consider Sterilization Compatibility
Every orthodontic instrument should withstand repeated sterilization.
Select instruments compatible with:
- Steam autoclaves
- Ultrasonic cleaning
- Instrument disinfectants
- Washer-disinfectors
Repeated sterilization should not affect:
- Alignment
- Cutting edges
- Joint movement
- Surface finish
Build Procedure-Based Instrument Sets
Instead of one universal kit, many clinics create specialized sets.
Examples include:
Initial Consultation Kit
- Mirror
- Explorer
- Probe
- Tweezers
Bonding Kit
- Bracket tweezers
- Bracket positioning gauge
- Bite stick
- Adhesive instruments
Wire Adjustment Kit
- Weingart pliers
- Bird beak pliers
- Distal end cutter
- Ligature cutter
Debonding Kit
- Bracket removing pliers
- Band remover
- Adhesive remover
- Scalers
Procedure-based kits improve efficiency and simplify sterilization workflows.
Don’t Forget Infection Control
Every custom orthodontic kit should support modern infection prevention protocols.
Best practices include:
- Sterilize instruments after every patient
- Use validated sterilization cycles
- Inspect instruments regularly
- Replace damaged tools immediately
- Store sterile instruments correctly
- Maintain sterilization records
Following infection control guidelines protects both patients and staff.
How Many Instrument Kits Should a Clinic Own?
A practical guideline is:
| Clinic Size | Recommended Kits |
|---|---|
| Single orthodontist | 5–8 complete kits |
| Two-chair clinic | 10–15 kits |
| Multi-chair practice | 15–30 kits |
The exact number depends on patient volume and sterilization turnaround times.
Common Mistakes When Building an Orthodontic Kit
Avoid these costly mistakes:
- Purchasing inexpensive low-quality instruments
- Ignoring sterilization compatibility
- Buying unnecessary specialty tools
- Failing to plan for future expansion
- Choosing poor ergonomic designs
- Mixing incompatible instrument brands without testing
- Overlooking replacement schedules
Strategic planning helps maximize return on investment.
Maintaining Your Orthodontic Instrument Kit
Routine maintenance extends instrument lifespan.
Recommended practices include:
- Clean immediately after use
- Lubricate hinged instruments
- Inspect cutting edges regularly
- Check alignment before sterilization
- Remove damaged instruments from service
- Store in protective cassettes
Proper maintenance preserves performance and reduces replacement costs.
Conclusion
Building a custom orthodontic kit for clinics is a strategic investment that improves treatment efficiency, enhances patient care, and supports long-term practice growth. By carefully selecting high-quality orthodontic instruments based on your procedures, patient volume, and workflow, you can create a reliable, cost-effective setup tailored to your clinic’s needs.
From essential pliers and diagnostic tools to sterilization-friendly organization systems, every component of your orthodontic instrument set contributes to smoother appointments and better clinical outcomes. Regular maintenance, proper infection control, and thoughtful expansion ensure your kit remains an asset as your practice evolves.
Frequently Asked Questions
What should every orthodontic kit for clinics include?
A basic kit should contain Weingart pliers, Bird Beak pliers, distal end cutters, ligature cutters, bracket tweezers, bracket removing pliers, band removing pliers, mirrors, explorers, probes, and bite sticks.
Is a custom orthodontic instrument kit better than a standard kit?
Yes. A custom kit allows clinics to select only the instruments required for their treatment procedures, improving workflow while avoiding unnecessary purchases.
How often should orthodontic instruments be replaced?
Replacement depends on usage, maintenance, and instrument quality. Well-maintained stainless steel instruments can last for years, although cutting instruments may require earlier replacement if they lose precision.
Can one kit serve multiple orthodontists?
It is possible, but busy practices typically maintain multiple complete kits to ensure uninterrupted patient care while instruments undergo sterilization.
Which material is best for orthodontic instruments?
Medical-grade stainless steel remains the preferred choice because it offers durability, corrosion resistance, precision, and compatibility with repeated autoclave sterilizatio