
Orthodontic treatment relies on precision, efficiency, and reliable instrumentation. Among the many specialized orthodontic instruments used in modern practices, orthodontic crimping tools play an essential role in improving appliance customization and treatment control. Whether adding hooks, stops, or auxiliaries to an archwire, these tools allow orthodontists to make accurate adjustments without replacing the entire wire.
As treatment techniques continue to evolve, orthodontic crimping pliers have become indispensable in both conventional braces and advanced orthodontic procedures. Their ability to securely attach crimpable accessories reduces chair time, improves patient comfort, and increases treatment flexibility.
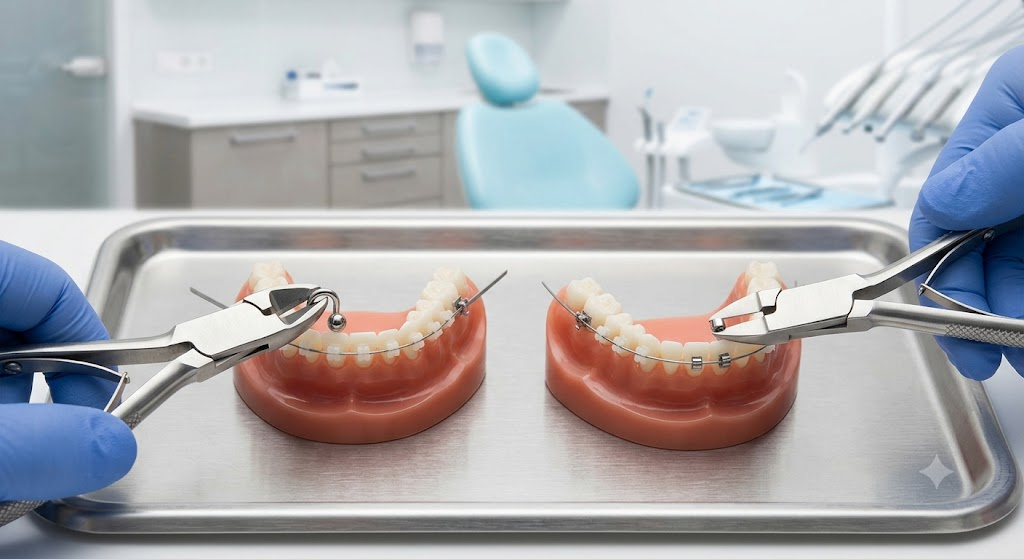
This comprehensive guide explains when and how to use orthodontic crimping tools, the different types available, clinical applications, maintenance recommendations, and expert tips for achieving optimal results.
What Are Orthodontic Crimping Tools?
Orthodontic crimping tools are precision orthodontic pliers specifically designed to securely attach crimpable hooks, stops, sleeves, and other orthodontic auxiliaries onto archwires without soldering or welding.
These instruments apply controlled pressure that permanently deforms the accessory around the archwire, creating a secure mechanical attachment while preserving wire integrity.
Modern orthodontic crimping pliers are manufactured from high-quality surgical stainless steel to provide:
- Excellent durability
- Corrosion resistance
- Precise jaw alignment
- Consistent crimping force
- Long service life
Why Orthodontists Use Crimping Tools
Orthodontists frequently need to customize treatment during different stages.
Instead of replacing an entire archwire, clinicians can simply add an accessory exactly where it’s needed.
Common reasons include:
- Adding elastic hooks
- Creating wire stops
- Preventing wire migration
- Improving elastic mechanics
- Supporting impacted tooth traction
- Enhancing anchorage control
- Modifying treatment without laboratory work
This flexibility saves both clinical time and material costs.
Common Orthodontic Accessories Used with Crimping Tools
Orthodontic crimping pliers are commonly used with:
- Crimpable hooks
- Ball hooks
- Kobayashi hooks
- Crimpable stops
- Wire sleeves
- Power arm attachments
- Elastic traction hooks
- Sliding mechanics accessories
These components can be positioned precisely according to each patient’s treatment requirements.
Types of Orthodontic Crimping Tools
1. Standard Crimping Pliers
The most commonly used version.
Features:
- Flat precision jaws
- Comfortable grip
- Accurate pressure control
- Suitable for most crimpable hooks and stops
Ideal for everyday orthodontic practice.
2. Hook Crimping Pliers
Designed specifically for securing crimpable hooks onto rectangular or round archwires.
Advantages include:
- Better hook positioning
- Reduced accessory slippage
- Faster placement
3. Stop Crimping Pliers
Used to place wire stops that prevent archwire movement.
Often used in:
- Sliding mechanics
- Space closure
- Anchorage management
4. Multi-Purpose Orthodontic Crimping Pliers
Some manufacturers combine:
- Crimping
- Hook placement
- Stop positioning
into one versatile instrument.
These reduce the number of instruments required during procedures.
When Should Orthodontic Crimping Tools Be Used?
During Elastic Wear
Hooks can be added exactly where elastics are needed without changing the existing archwire.
This allows:
- Improved force direction
- Customized elastic placement
- Greater treatment flexibility
During Space Closure
Crimpable stops prevent unintended wire movement while maintaining proper force application.
During Impacted Tooth Exposure
Crimpable hooks allow orthodontists to apply traction to impacted teeth after surgical exposure.
Common applications include:
- Impacted canines
- Impacted premolars
- Unerupted incisors
Anchorage Control
Additional auxiliaries help optimize biomechanics and improve anchorage management.
Mid-Treatment Adjustments
Treatment plans often change.
Instead of fabricating a new wire, orthodontists can modify the existing archwire using crimpable accessories.
Step-by-Step Guide: How to Use Orthodontic Crimping Tools
Step 1: Select the Appropriate Accessory
Choose:
- Hook
- Stop
- Sleeve
- Auxiliary
compatible with the wire size.
Step 2: Position the Accessory
Slide the accessory onto the archwire.
Ensure correct orientation before crimping.
Step 3: Align the Crimping Tool
Place the crimping plier jaws directly over the accessory.
Maintain proper alignment to ensure even pressure.
Step 4: Apply Controlled Pressure
Close the handles gradually.
Avoid excessive force, which may deform the wire.
A properly crimped accessory should not rotate or slide.
Step 5: Verify Security
Check:
- Stability
- Position
- Patient comfort
Reposition if necessary before continuing treatment.
Clinical Advantages of Orthodontic Crimping Tools
Faster Chairside Procedures
Orthodontists can place accessories within seconds.
This reduces appointment duration.
Improved Treatment Flexibility
Accessories can be added or removed during treatment without changing the entire appliance.
Better Patient Comfort
Modern crimpable accessories are:
- Compact
- Smooth
- Low profile
which minimizes irritation.
Greater Precision
High-quality orthodontic crimping pliers provide accurate placement with minimal wire distortion.
Cost Savings
Replacing only an accessory rather than an entire wire reduces treatment expenses.
Common Clinical Applications
Orthodontic crimping tools are widely used for:
- Class II elastics
- Class III elastics
- Open bite correction
- Deep bite correction
- Midline correction
- Impacted canine traction
- Anchorage reinforcement
- Space closure
- Sliding mechanics
- Temporary anchorage mechanics
Features to Look for in Quality Orthodontic Crimping Tools
When purchasing orthodontic instruments, consider:
High-Grade Stainless Steel
Provides:
- Rust resistance
- Long lifespan
- Autoclave compatibility
Precision Machined Tips
Well-aligned jaws improve:
- Crimp accuracy
- Consistency
- Reduced accessory damage
Ergonomic Handles
Comfortable grips reduce hand fatigue during repetitive procedures.
Smooth Joint Mechanism
A high-quality box joint improves:
- Stability
- Precision
- Instrument longevity
Autoclavable Construction
Instruments should tolerate repeated sterilization cycles without corrosion.
Common Mistakes to Avoid
Over-Crimping
Excessive force may:
- Damage accessories
- Distort archwires
- Affect biomechanics
Improper Positioning
Incorrect placement can reduce treatment effectiveness.
Always verify location before crimping.
Using Worn Instruments
Misaligned jaws may create weak crimps.
Regular inspection is essential.
Ignoring Wire Compatibility
Different accessories fit different wire dimensions.
Always verify compatibility.
Cleaning and Maintenance
Proper maintenance extends instrument life.
Recommended procedures include:
- Clean immediately after use
- Remove debris with soft brushes
- Ultrasonic cleaning when appropriate
- Thorough rinsing
- Complete drying
- Lubricate joints periodically
- Sterilize according to manufacturer recommendations
- Store in dry instrument cassettes
Routine maintenance preserves precision and prevents corrosion.
Best Practices for Optimal Clinical Results
To maximize efficiency:
- Use manufacturer-recommended accessories.
- Verify wire dimensions before placement.
- Apply gradual, even pressure.
- Inspect crimps after placement.
- Sterilize instruments after every patient.
- Perform routine maintenance checks.
- Replace worn instruments promptly.
The Future of Orthodontic Crimping Tools
Innovations in orthodontic instrument manufacturing continue to improve crimping tool performance. Modern designs feature enhanced ergonomics, precision-machined jaws, and improved stainless steel alloys that increase durability and consistency. As digital orthodontics and customized treatment planning advance, crimping tools remain a practical solution for chairside customization without compromising efficiency or patient comfort.
Conclusion
Orthodontic crimping tools are indispensable instruments for creating customized, efficient, and predictable orthodontic treatments. By enabling the secure placement of hooks, stops, and other auxiliaries directly onto archwires, they reduce chair time, simplify appliance modifications, and improve biomechanical control throughout treatment.
Choosing high-quality orthodontic crimping pliers, following proper crimping techniques, and maintaining instruments correctly ensures reliable clinical performance and long-term durability. Whether managing space closure, elastic wear, anchorage control, or impacted tooth traction, these versatile tools remain a valuable part of every modern orthodontic practice.
Frequently Asked Questions:
Orthodontic crimping tools attach hooks, stops, sleeves, and other auxiliaries securely onto orthodontic archwires without soldering.
Yes. Modern crimpable hooks provide excellent retention while eliminating laboratory procedures, making them a popular chairside alternative.
When used correctly, high-quality crimping pliers apply controlled pressure without significantly affecting the structural integrity of the archwire.
Compatibility depends on the accessory manufacturer. Most crimpable hooks are designed for common round and rectangular orthodontic archwires.
With proper maintenance and sterilization, premium stainless steel orthodontic crimping tools can remain clinically reliable for many years. Replace them if jaw alignment, hinge movement, or crimping precision deteriorates.