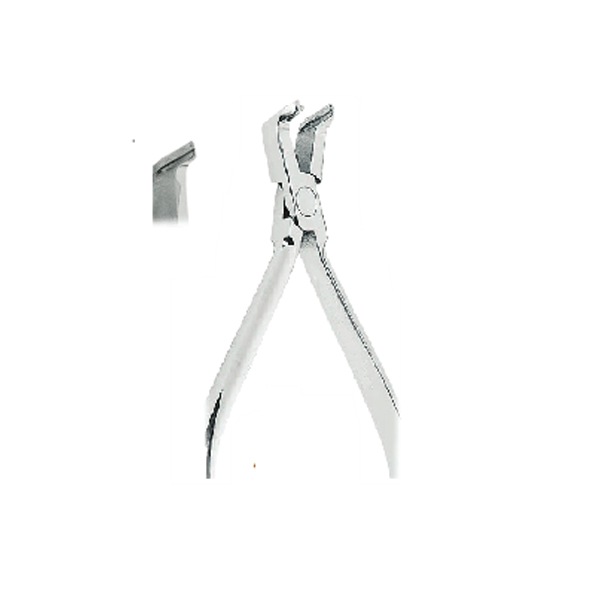
Video Demo: How to Use Distal End Cutter – distal end cutter tutorial

A distal end cutter tutorial explains the correct method for using a specialised orthodontic cutter to trim excess archwire behind molar tubes. The instrument cuts the wire precisely while capturing the removed segment, helping orthodontists improve patient comfort, maintain safety, and complete braces adjustments efficiently during routine orthodontic procedures.


Introduction: Why Learning the Correct Distal End Cutter Technique Matters

Orthodontic treatment depends on precision, and every instrument used during braces adjustment has a specific purpose. Among these tools, the distal end cutter plays a critical role because it allows orthodontists to remove excess archwire safely and efficiently.

When an archwire extends beyond the last molar tube, the remaining wire can irritate the patient’s cheek or surrounding soft tissues. Therefore, orthodontists use a distal end cutter to create a clean finish while reducing discomfort.

This distal end cutter tutorial provides a complete explanation of the instrument, including its purpose, correct usage technique, maintenance requirements, common mistakes, and professional buying considerations.

Whether you are a dental student, orthodontic professional, or dental instrument buyer, understanding this tool helps improve clinical performance and product selection.


What Is a Distal End Cutter?

A distal end cutter is a specialised orthodontic plier designed to cut the excess portion of an archwire after it has been placed into brackets or molar tubes.

Unlike conventional wire cutters, this instrument includes a retention mechanism that captures the cut wire fragment. As a result, the removed piece does not fall into the patient’s mouth.

https://images.openai.com/static-rsc-4/OTj4gyDngdcsKrcbeatooVK83Lv6rxg3un6xzsGaxGrFvrE9PXLgTHMzI6GWWaIzH2-kv2m73WOn9dktB-qPdymC9SbjUvpC_SuijUpicDXM3gnGUtD3GSeIG-zQcnXse7-RNBILFv_Eb-Q4K1EbjOljKPKLhLdGalum1OmPwVGbZeD4lKek-h5mjgNSnbUo?purpose=fullsize

Main Functions of a Distal End Cutter

A professional distal end cutter helps orthodontists:

  • Trim excess archwire after bracket placement
  • Remove sharp wire extensions
  • Improve patient comfort
  • Prevent accidental swallowing of cut wire pieces
  • Complete orthodontic adjustments faster

Additionally, its specialised design provides better control compared with general-purpose cutting instruments.


Why Is a Distal End Cutter Important During Orthodontic Treatment?

During orthodontic procedures, archwires create controlled forces that gradually move teeth into the desired position. However, after inserting the wire, the distal end often extends beyond the molar tube.

Without proper trimming, the extra wire may cause:

  • Cheek irritation
  • Soft tissue injuries
  • Patient discomfort
  • Emergency dental visits

Therefore, using the correct orthodontic instrument is essential.

Clinical Benefits of Using a Distal End Cutter

BenefitClinical Importance
Wire retentionPrevents cut fragments from entering the mouth
Precision cuttingCreates a clean and controlled cut
Patient comfortRemoves irritating wire extensions
EfficiencyReduces adjustment time
SafetySupports controlled orthodontic procedures

Distal End Cutter vs Regular Wire Cutter

Although both instruments cut wires, they serve different purposes.

FeatureDistal End CutterRegular Wire Cutter
Main purposeCutting distal archwire endsGeneral wire cutting
Wire retentionIncludedUsually unavailable
Orthodontic designSpecifically developed for bracesGeneral application
Cutting locationNear molar tubesVarious locations
Patient safetyHigher controlRequires additional caution

Consequently, orthodontic professionals prefer distal end cutters when working near the distal end of archwires.


Parts of a Distal End Cutter

Understanding the design helps users operate the instrument correctly.

1. Cutting Blades

The cutting edges perform the main function of the instrument.

High-quality blades should provide:

  • Accurate alignment
  • Smooth cutting action
  • Long-lasting sharpness

Moreover, precise blade manufacturing reduces the amount of force required during procedures.


2. Wire Holding Mechanism

One of the most important features is the retention system.

After cutting:

  1. The wire separates from the archwire.
  2. The cutter holds the removed piece.
  3. The orthodontist safely removes the fragment.

As a result, the procedure becomes safer and more controlled.


3. Ergonomic Handles

Comfortable handles allow better instrument control.

They help orthodontists maintain:

  • Proper grip
  • Better visibility
  • Reduced hand fatigue
  • Improved cutting accuracy

Step-by-Step Guide: How to Use a Distal End Cutter

Step 1: Inspect and Prepare the Instrument

Before starting the procedure, check the cutter carefully.

The orthodontist should confirm:

✔ Cutting edges are aligned
✔ Hinges move smoothly
✔ Instrument is properly sterilised
✔ No visible damage exists

Furthermore, regular inspection prevents unexpected instrument failure.


Step 2: Prepare the Patient Area

Before cutting the wire:

  • Retract the cheek properly
  • Ensure good visibility
  • Position lighting correctly
  • Confirm the wire location

A clear working area allows better control and improves patient safety.


Step 3: Identify the Excess Archwire

Locate the portion of wire extending beyond the distal end of the molar tube.

At this stage, avoid rushing because incorrect positioning may lead to an uneven cut.

Instead:

  • Confirm the cutting point
  • Check the wire angle
  • Ensure the instrument fits correctly

Step 4: Position the Distal End Cutter Correctly

Place the cutter close to the molar tube while maintaining proper alignment.

The instrument should:

  • Engage the wire completely
  • Remain stable during cutting
  • Avoid unnecessary movement

Therefore, correct positioning is one of the most important parts of the technique.


Step 5: Cut the Archwire Smoothly

Apply controlled pressure until the cutter completes the cut.

Avoid:

  • Excessive force
  • Twisting movements
  • Sudden pressure

A sharp, well-maintained instrument should complete the cut efficiently.


Step 6: Remove and Check the Cut Area

After cutting:

  • Confirm the wire fragment has been captured
  • Remove the instrument carefully
  • Check the remaining wire end

Finally, ensure no sharp edges remain that could irritate the patient.


Common Mistakes When Using a Distal End Cutter

Even experienced professionals should avoid several common errors.

Using the Wrong Cutting Instrument

A distal end cutter should not replace other orthodontic cutters.

For example:

  • Ligature cutters are designed for thin ligatures.
  • Hard wire cutters handle stronger materials.
  • Distal end cutters are designed specifically for distal archwire trimming.

Therefore, selecting the correct instrument improves both safety and performance.


Applying Excessive Force

If the cutter requires significant pressure, the problem may involve:

  • A dull cutting edge
  • Incorrect instrument selection
  • Improper positioning

Instead of forcing the instrument, inspect the cause first.


Ignoring Instrument Maintenance

Poor maintenance can reduce:

  • Cutting efficiency
  • Instrument lifespan
  • Clinical reliability

Regular cleaning, inspection, and sterilisation are therefore essential.