
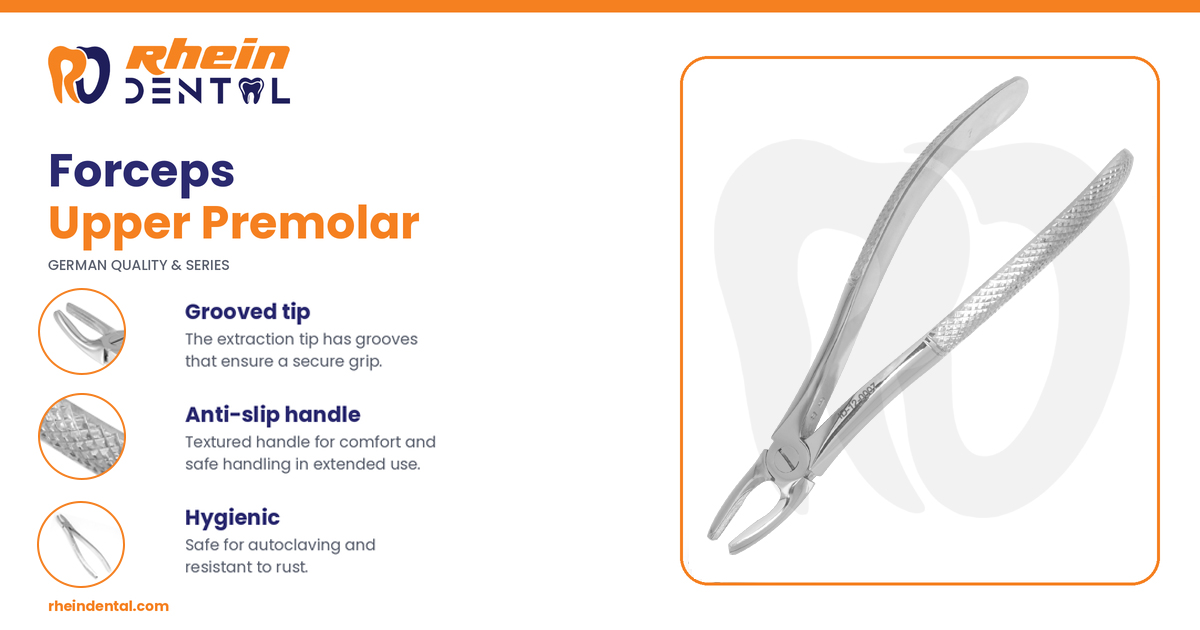
The forceps upper premolar extractions depend on is one of the most commonly stocked instruments in any dental or oral surgery tray. Upper premolars look simple, but their roots are slender, their buccal plates are thin, and a poorly matched instrument can fracture a root in seconds. This guide explains what upper premolar forceps are, how the design differs from other maxillary forceps, how to choose between patterns, and how to use them with control.
What Are Upper Premolar Forceps?
Upper premolar forceps (also called upper bicuspid forceps or maxillary premolar extraction forceps) are extraction forceps shaped to grip the crown and cervical area of maxillary premolars, teeth 14, 15, 24 and 25 in FDI notation, and to deliver them along the path of least resistance.
Like all extraction forceps they have three working parts:
- Beaks: the gripping ends that engage the tooth. For upper premolars they are typically narrow and concave to seat on a small, rounded crown.
- Hinge: the joint that transfers handle pressure to the beaks.
- Handles: the part held in the palm. Maxillary forceps usually have handles that are straight or gently curved in line with the beaks, which suits access to the upper arch.
Parts and Design of the Forceps of Upper Premolar Extraction
Looking at the forceps of upper premolar design in more detail, the beaks are set in line with the handles rather than at a right angle, because the upper arch is approached from a more direct angle. Beak width is narrow compared with molar forceps, and the inner surfaces are shaped to hug the cervical root without crushing it. Understanding these features helps you spot a poorly manufactured instrument before it reaches the patient.
Premolar Forceps Upper vs Lower: Knowing the Difference
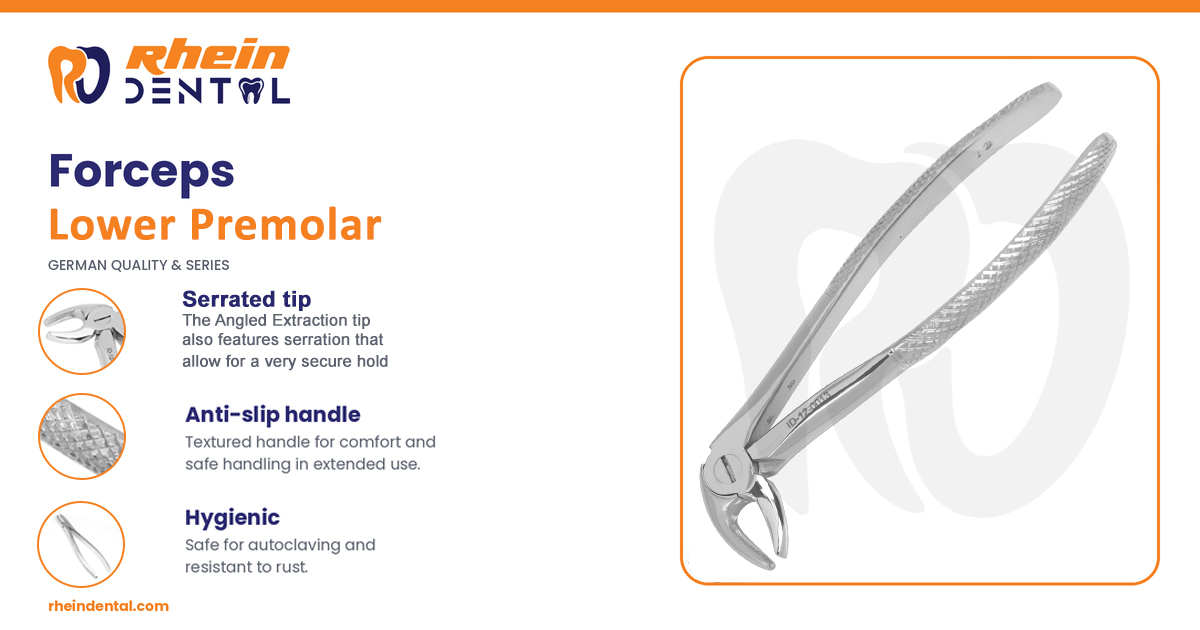
If you search for premolar forceps upper and lower sets, you will see that they are not interchangeable. Lower premolar forceps have beaks angled roughly 90 degrees to the handles to suit the mandibular arch, while the upper pattern is straighter. Many manufacturers sell them as separate items, and a sterile tray should always label which is which.
Why Upper Premolars Need Their Own Forceps
Anatomy explains most of the design.
- Slender roots. The upper first premolar frequently has two thin roots (buccal and palatal) and sometimes a fine apical curve. The upper second premolar usually has a single, flattened root. Thin roots fracture easily under excess force.
- Thin buccal bone. The buccal plate over upper premolars is relatively thin, so the tooth is generally expanded buccally rather than forced palatally first.
- Small crown. Beaks made for molars or incisors do not seat securely, which encourages slipping and crown fracture.
Matching the beak size and shape to the tooth lets you grip as far apically as possible on the root surface, which is the single biggest factor in a controlled extraction.
Upper Premolar Forceps vs Universal Upper Forceps
Many clinics use a universal upper forceps (the American No. 150 pattern is the best-known example) for incisors, canines and premolars. These have straight, narrow-beaked heads and work well on single-rooted maxillary teeth. A forceps designed specifically for upper premolars, often with slightly narrower or more tapered beaks, can give a more precise fit on small or tilted crowns.
Practical rule of thumb: if the beaks grip the root surface evenly on both sides without bottoming out on the crown, the instrument is a good match, whatever its name. Numbering systems differ between the American, English and other patterns and between manufacturers, so always check the manufacturer’s catalog rather than relying on number alone.
Forceps for Upper Premolar Extraction: What to Look For
When buying or replacing forceps for upper premolar work, check:
- Beak fit. Beaks should close with even contact and no gap. Misaligned beaks crush crowns.
- Material. Stainless steel (commonly 410 or 420 grade for durability) that tolerates repeated autoclaving without pitting.
- Hinge action. The joint should move smoothly without play. Looseness reduces tactile feedback.
- Handle ergonomics. Serrated or textured handles prevent slipping when gloved and wet.
- Pattern. Choose between universal and premolar-specific designs based on your case mix, and consider a pediatric size if you treat children, since smaller arches need smaller instruments.
- Brand and certification. Look for ISO 13485 manufacturing and CE or FDA registration where applicable, and read sterilization instructions before purchase.
How the Upper Premolar Forceps Are Used: Technique Overview
The following is a general outline. Technique varies with the individual tooth, bone density and operator training.
- Anesthesia and luxation. Achieve profound anesthesia, then loosen the periodontal attachment with a periosteal elevator and, where needed, a straight elevator.
- Confirm the plan. Review the radiograph for root number, curvature, dilaceration, sinus proximity and any ankylosis.
- Seat the beaks. Place the beaks as far apically on the root as possible, aligned with the long axis of the tooth.
- Apply controlled pressure. Use gentle, steady buccal then palatal movements to expand the socket. Because upper first premolars can have two fine roots, avoid heavy rotation, which can break them. A small amount of rotation is more tolerable on single-rooted second premolars.
- Deliver along the path of least resistance. Once mobile, deliver the tooth in line with its long axis. Avoid forcing it apically against the sinus floor.
- Inspect the socket and the tooth. Check that all roots were removed, curette as appropriate and control bleeding.
Common errors include gripping the crown instead of the root, using too much force before the socket has expanded, and rotating a two-rooted tooth.
Handling Difficult Cases
If a root fractures or the tooth will not move with forceps alone, stop forcing the instrument. Consider a surgical approach: raising a flap, removing buccal bone, sectioning the tooth, and using elevators. Upper second premolars can sit close to the maxillary sinus floor, so any apical root fragment needs careful management to avoid an oroantral communication.
Care, Sterilization and Maintenance
Extraction forceps are reusable instruments and should be reprocessed correctly after every patient:
- Rinse or pre-soak immediately to prevent debris from drying.
- Clean with an ultrasonic cleaner or washer-disinfector, with the hinge opened.
- Dry fully, then lubricate the hinge with instrument milk.
- Package and autoclave according to your local protocol and the manufacturer’s instructions.
- Inspect beaks regularly for chips, wear or misalignment and retire any damaged instrument.
Buying a Premolar Upper Forceps Set: Quick Checklist
When ordering a premolar upper forceps for a new clinic or a student kit, confirm the pattern name and number, beak width, material grade, sterilization compatibility and warranty. Ask whether adult and pediatric sizes are sold separately, and request the manufacturer’s instructions for use.
Frequently Asked Questions
What is the difference between upper premolar forceps and upper bicuspid forceps?
Nothing functional. “Bicuspid” is the older term for premolar, so both names describe forceps for the same teeth.
Can I use the same forceps for upper incisors and premolars?
Often yes. Universal upper forceps are commonly used across maxillary anterior teeth and premolars, though a premolar-specific design may fit small crowns better.
Are upper and lower premolar forceps interchangeable?
Generally no. Lower forceps are angled so the beaks sit at a right angle to the handles to suit the lower arch, while upper forceps are straighter. Using the wrong one makes access and alignment awkward.
How do I know if the forceps are the right size?
The beaks should grip the root evenly without pinching only the crown tip. If the instrument rocks or slides, try a different size or pattern.
Key Takeaways
Choosing the right forceps for an upper premolar is about matching instrument to anatomy: narrow beaks, a firm apical grip and gentle controlled movements. Keep the instruments sharp, aligned and sterile, and know when to switch from forceps to a surgical approach.